I wanted to start using Vagrant, to create a virtual machine that would allow me to test different ArchLinux install scripts, window manager settings, etc… without messing up my machine.
That would make me start by loading the
archlinux/archlinux
box with the libvirt integration, which needed me to install
libvirt. I wanted to use KVM as an hypervisor for that, so I needed to
install QEMU for it, since KVM is a special operating mode of
QEMU.
To enable networking for the hypervisor, I needed to also install ebtables and
dnsmasq. In an other blog post, I will look into why we need those packages.
Let’s just accept that we need them for now.
I also wanted to be able to easily connect to a graphical interface, to see a
desktop. The easiest for that is to install virt-manager
Installing all of this is, on Arch linux, as easy as
pacman -S libvirt qemu virt-manager ebtables dnsmasq
You’ll then have to start (and enable) the libvirt daemon
systemctl start libvirtd
systemctl enable libvirtd
Use virt-manager as a user
Out of the box, virt-manager only allows users from the libvirt group to manage virtual machines. I added myself to the group
sudo usermod -aG libvirt <user>
Then re-logged, and launched virt-manager.
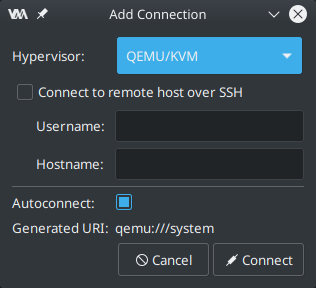
Use KVM/QEMU in virt-manager
By default, virt-manager is configured with only an LXC connection.
To get it to use QEMU/KVM, go to Files > Add a connection. Choose the
QEMU/KVM hypervisor, then click connect. That will create the connection
to the hypervisor
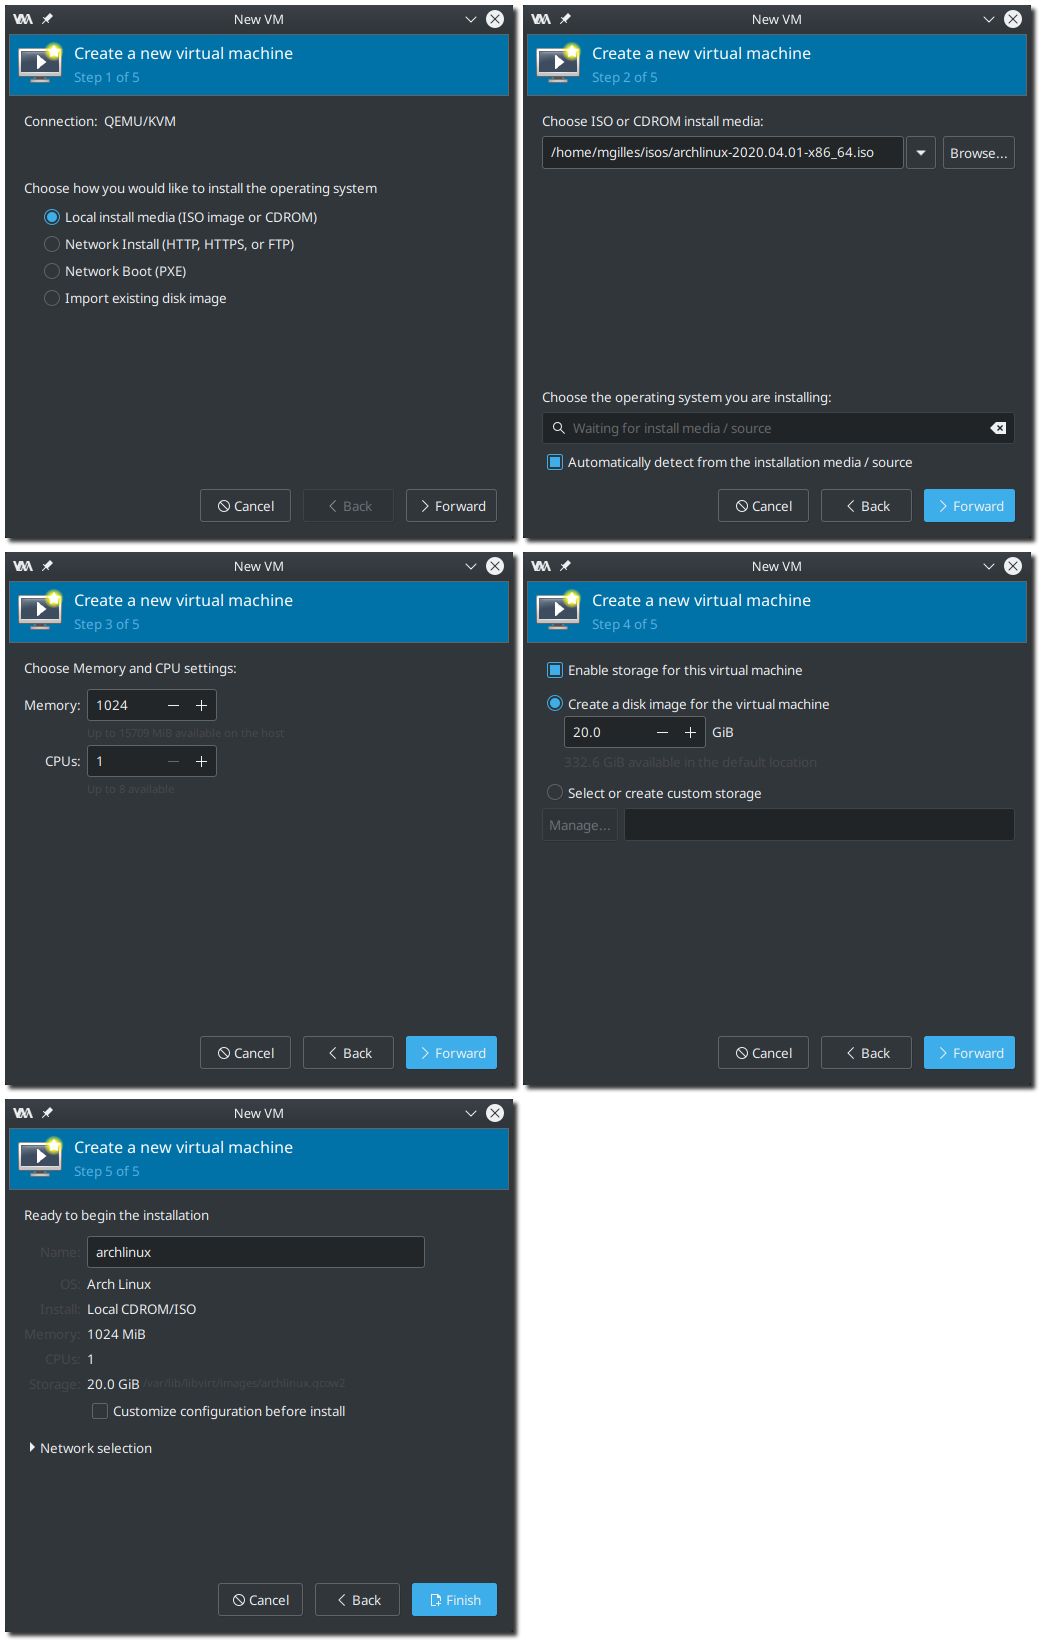
Create first virtual machine
Once this is all done, we can test that everything is working by creating a new
machine. I downloaded the ArchLinux ISO (see here on how I did it from the CLI),
then Add a new virtual machine.
Choose Local install media, then when asked to choose the ISO, click on
Browse. Click on Browse Local, and choose the ISO you just downloaded.
The installer will ask to fix permissions for you. This will change the ISO
file ownership to nobody:kvm so that libvirt can access the file.
You can then click on continue, then finish at the end, and your machine will now launch !
What’s next
This was done so that I can deploy a new machine using Vagrant and get an interface through the virt-manager. That’s what I will explore in a next post.
I learned a few tricks while writing this post, about image capture and
processing. I’ll explore a bit of
scrot, that I
used to get the screenshots, and of
imagemagick, that allowed me to stitch
the images together.