I’ve been using nm-applet in
i3 to manage my networks, and it works pretty well. However, I don’t really
like the icons it comes with in my systray, so I decided to try my hand at creating a little helper
to get rid of it and manage my networks in an other way. Basically, I want to be able to connet to
a wifi from the list of available ones.
This article is based on ArchLinux, assumes that you are using
NetworkManager and that you have
rofi installed.
Choosing a network
Using NetworkManager, and more precisely its
cli nmcli, we can get a list of all of the available wifi networks. To get started, you can see
that with
nmcli device wifi list
I masked the results of this command but you can get a good idea of what we get:
IN-USE  BSSID              SSID    MODE   CHAN  RATE      SIGNAL  BARS  SECURITY
        **:**:**:**:**:**  ******  Infra  1     195 Mb/s  97      ▂▄▆█  WPA2
*       **:**:**:**:**:**  ******  Infra  36    540 Mb/s  95      ▂▄▆█  WPA2
        **:**:**:**:**:**  ******  Infra  56    405 Mb/s  87      ▂▄▆█  WPA1 WPA2
        **:**:**:**:**:**  ******  Infra  1     130 Mb/s  85      ▂▄▆█  WPA1 WPA2
        **:**:**:**:**:**  ******  Infra  1     130 Mb/s  84      ▂▄▆█  WPA2 802.1X
        **:**:**:**:**:**  ******  Infra  100   405 Mb/s  75      ▂▄▆_  WPA2
        **:**:**:**:**:**  ******  Infra  100   405 Mb/s  74      ▂▄▆_  WPA2
        **:**:**:**:**:**  ******  Infra  11    130 Mb/s  65      ▂▄▆_  WPA2
        **:**:**:**:**:**  ******  Infra  44    405 Mb/s  55      ▂▄__  WPA1 WPA2
        **:**:**:**:**:**  ******  Infra  36    135 Mb/s  49      ▂▄__  WPA2
        **:**:**:**:**:**  ******  Infra  100   135 Mb/s  47      ▂▄__  WPA2
        **:**:**:**:**:**  ******  Infra  6     270 Mb/s  45      ▂▄__  WPA2 802.1X
        **:**:**:**:**:**  ******  Infra  11    130 Mb/s  45      ▂▄__  WPA2
        **:**:**:**:**:**  ******  Infra  6     270 Mb/s  44      ▂▄__  WPA1 WPA2
        **:**:**:**:**:**  ******  Infra  100   540 Mb/s  35      ▂▄__  WPA2
        **:**:**:**:**:**  ******  Infra  100   270 Mb/s  35      ▂▄__  WPA2
        **:**:**:**:**:**  ******  Infra  6     130 Mb/s  32      ▂▄__  WPA2
        **:**:**:**:**:**  ******  Infra  6     65 Mb/s   32      ▂▄__  WPA2
        **:**:**:**:**:**  ******  Infra  11    195 Mb/s  30      ▂___  WPA2
I did not want to parse this list, and I wanted to list only the SSIDs of the networks. Taking a
look in the documentation of nmcli, I found the -g option that
allows to get the values of specific fields.
The command becomes:
nmcli -g SSID device wifi list
listing the available networks. We can then pass this to
rofi using the -dmenu option to accept input from stdin.
I also added the -i option to have a case insensitive search, -p "Wifi network" for a prompt and
-no-custom to ensure that we only get either a value from the list or an empty string.
The network we want to connect can then be chosen and returned using
rofi:
nmcli -g SSID device wifi | rofi -dmenu -i -p "Wifi network" -no-custom
Connecting to a network
NetworkManager has a list of all the known networks and their configuration, including their password. Before creating a new connection to the network we chose previously, let’s see if the connection exists.
Getting the existing connections can be done simply using nmcli (we only want the names of the connections, which by default are the SSID of the WiFi network):
nmcli -g NAME connection
we can then check if the selected network is in this list with the following structure
if [[ -n $(nmcli -g NAME connection | grep $chosen_network) ]]; then
    ...
fi
If the connection exists, we can simply connect by running
nmcli connection up id <connection>
If the connection does not yet exist, we can instead create a new one:
nmcli device wifi connect <SSID>
This command will ask you for the password to connect to the network if necessary
Putting everything together
We now have all the pieces to put a very basic script together to connect to a WiFi network. We will choose a network to connect to amongst the available ones, check if a connection exists, then connect to it or create a new connection. Since getting the available networks takes a few seconds, we’ll also display a notification telling us that the menu is coming.
#!/bin/bash
# wifi-menu
notify-send -t 1000 "Getting WiFi networks..."
chosen_network=$(nmcli -g SSID device wifi | rofi -dmenu -i -p "Wifi network" -no-custom)
if [[ -z $chosen_network ]]; then
    # If we have not chosen a network, the previous command will return an empty string
    # and we can exit right away
    exit 1
fi

if [[ -n $(nmcli -g NAME connection | grep $chosen_network) ]]; then
    nmcli connection up id $chosen_network
else
    nmcli device wifi connect $chosen_network
fi
Let’s run this script:
./wifi-menu
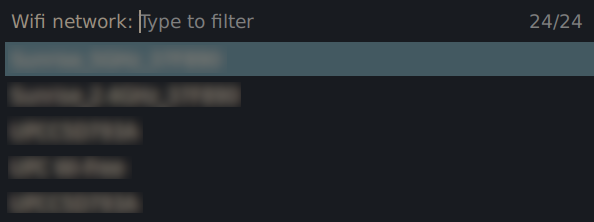
After a bit, you’ll get the rofi menu with the list of
available networks:

Just select the network, and you’re good to go !
i3 binding
To be able to call this menu anytime in i3, you’ll then need to create a new
binding for it. Since it was available, I chose to go with Meta+Shift+t, and set the following in
my i3 configuration
# i3
...
bindsym $mod+Shift+t exec --no-startup-id <path>/wifi-menu
...
Other options
While this script works, you may want to use something a bit more sophisticated to get more options
out of your WiFi menu. I already talked about nm-applet before, which is very lightweight and
works really well. An other interesting option I discovered while writing this is networkmanager dmenu, which is
basically this script on steroids, allowing you to connect to WiFi, bluetooth, enabling and
disabling interfaces, and more.
Should you use a custom menu ? Maybe. Will I use it in the end ? Not sure yet, because I still need a way to know which network I am connected on (maybe that would have been a better first step ?).
This was fun to get working, and I learned more about NetworkManager. I hope you learned something interesting as well.